Continuous Integration and Deployment/Delivery
caution
This document may not apply to every shop. Please talk to your shop manager to determine if this document applies to your shop.
For a more in-depth look at CI/CD see GitHub's video about CI/CD
Continuous integration#
As we work on a feature in a feature branch, others' work is being accepted and merged into master. When we get our feature working in our feature branch, we don't want to merge it into master until we know that our changes will also work with the new changes in master. So before we merge our feature into master, we must first integrate our changes with the new changes in master to make sure they properly work together. This integration process becomes riskier and more difficult the more master and our feature branch diverge from each other. In fact, it can become so difficult that we may choose to abandon our feature branch and start over! To help avoid these situations and make integration easier, we use continuous integration.
Continuous Integration (CI) is the practice of frequently integrating our work and master. By integrating our work and master several times a day each integration becomes smaller and easier because the two branches are not allowed to diverge too far. By the time we are "done" with our feature, the final integration should be just another small integration.
GitLab can be enabled to help us with CI. When CI checks are enabled, GitLab checks if a merge request's feature branch can be safely merged with master each time we push a commit to the feature branch. GitLab does this by merging master and our feature branch into a separate temporary branch and then runs the projects automated tests on the temporary branch. GitLab reports the results of merging and testing to the merge request. GitLab won't allow a merge-request to be merged into master unless its CI checks pass.
Notice that just because CI is enabled on a project doesn't mean you are practicing CI. To practice CI, you must regularly push changes to a feature branch associated with a merge request, check the results of GitLab's integration test, and integrate master into your feature branch if GitLab's integration test fails.
Continuous deployment/delivery#
Once you know that your feature branch can be safely merged into master, do you know that it can be safely installed and run in a known environment? That is, is it safe to deploy? Probably not. Again, we don't want to merge our work into master unless we know that the merged version can successfully be deployed. And the best way to find out is to deploy the merged version.
Continuous Deployment (CD) is the practice of frequently deploying the successfully integrated system into a staging or production environment.
As with CI, GitLab can be enabled to help with CD. When enabled, GitLab will first perform CI checks, and if those pass it will try to deploy the merged version into an existing or new environment (depending on how it is configured). GitLab reports the results of its attempt to the merge-request. GitLab won't allow a merge-request to be merged if it fails its CD checks.
As a bonus, when you use CD, you and other stakeholders can interact with the deployed system allowing you to easily demo or manually test the integrated system before merging it into master.
GitLab setup#
GitLab has built-in CI that can be enabled from the settings menu.
Click the CI / CD tab in GitLab and follow the included instructions to enable this for your project.
Using Heroku for CI/CD#
info
See FoodKeep-Api for a working example of this technique.
This guide is broken up into two separate sections, Heroku Configuration Guide and a Developers Guide, that will allow you to setup your repository for CI/CD to Heroku. Additionally, steps are included to allow the configuration of Heroku to be able to promote code from a staging environment to a production environment.
** Configuring Heroku for CI/CD with GitLab**Warning these steps may need to be performed by someone with trustee infrastructure permissions
We are going to assume you have a repository currently setup in Gitlab you would like to deploy to Heroku. You will need an account on Heroku, git-bash shell, and an editor (I recommend Notepad++) We’ll work on this in three phases. First we’ll setup Heroku then, we’ll setup Gitlab CI/CD for Heroku. Once these two steps are complete a shop developer can perform the steps to push the repository as outlined in the Shop developer guide to migrating Heroku.
Heroku Setup:
Login to the projects Heroku account. You will need the projects API Key from Heroku during the GitLab setup portion so go ahead and grab it now and paste it in a safe place. In Heroku navigate to Account Settings and click the reveal button to see your API Key.

Copy it and paste it to your notepad.
Now you need to create a new app. At this point you should consider creating two environments to work from. A Staging environment and a Prod environment. We’ll configure the staging environment so that you have ability to promote your app from staging to production on Heroku.
Let’s start off creating the Staging environment first. On the Heroku website navigate back to your home screen and click on the New button located in the upper right hand portion of the screen:

Give the apps a meaningful name. For the staging environment I used:
Heroku-Myapp-env-staging
Create a new app for your Production environment as well. In my case I named my prod environment:
Heroku-Myapp-env-prod
Copy and paste the names to notepad with your api key. You will need all three for the Gitlab CI/CD setup steps.
Configure Gitlab to deploy to Heroku
Log into Gitlab and open your project. Go to settings > CI/CD
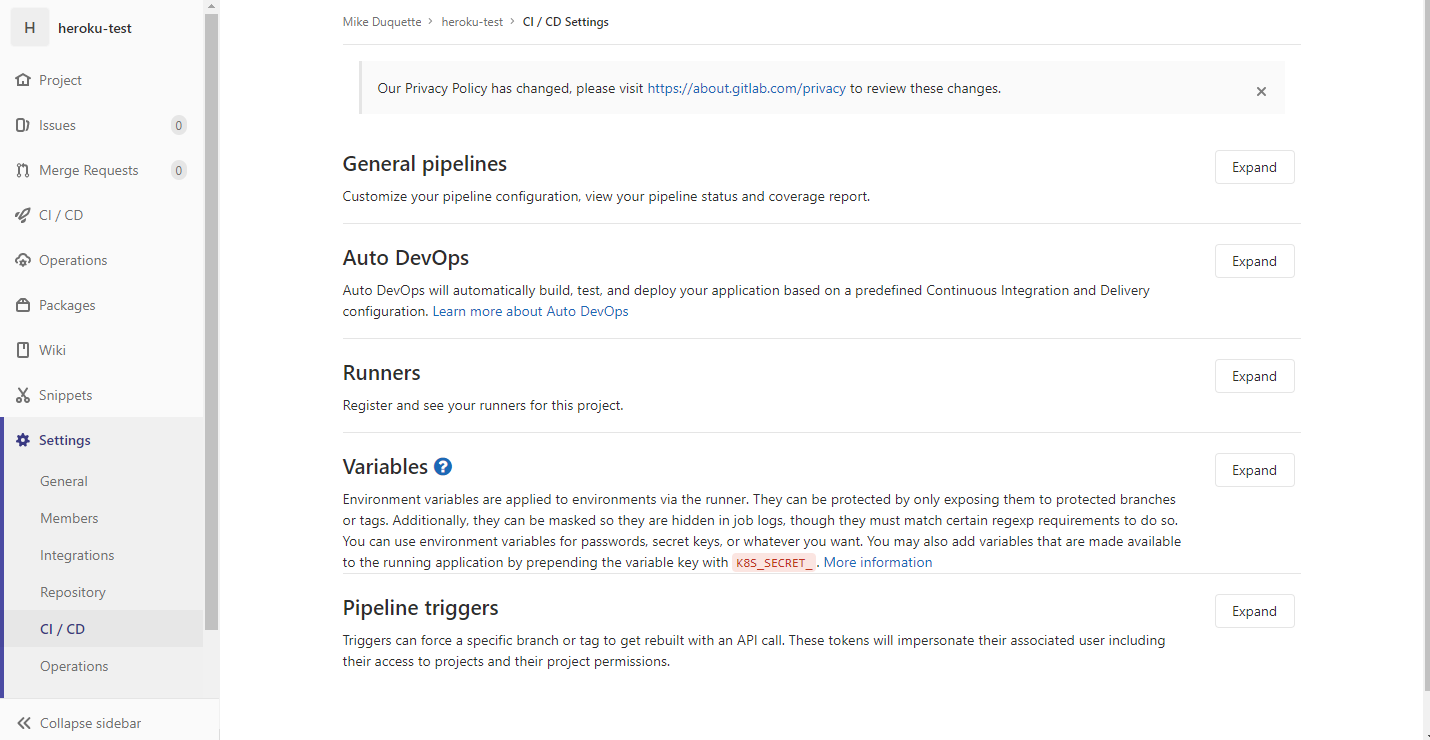
Expand the Runners Category and make sure you have them enabled. For my setup I am using the shared Runners.
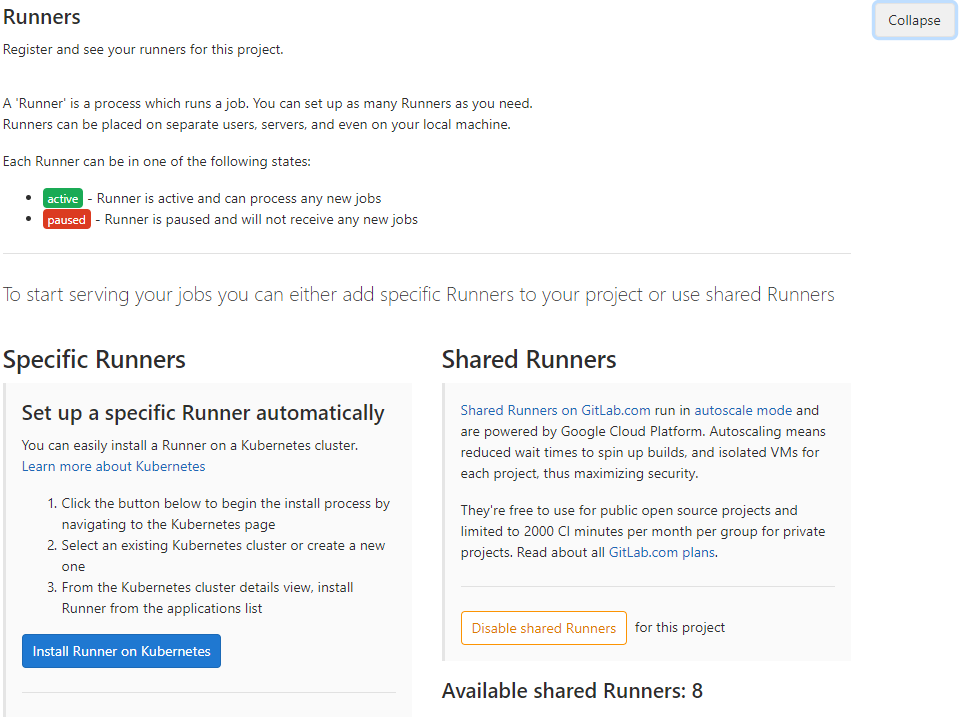
Once you verify that the Runners are enabled (you should see a positive value next to Available shared Runners: ) you need to expand the Variables category and add three new variables:
HEROKU_API_KEY (your api key you copy and pasted earlier)
HEROKU_APP_PRODUCTION (the name if your production Heroku app)
HEROKU_APP_STAGING (the name if your staging Heroku app)
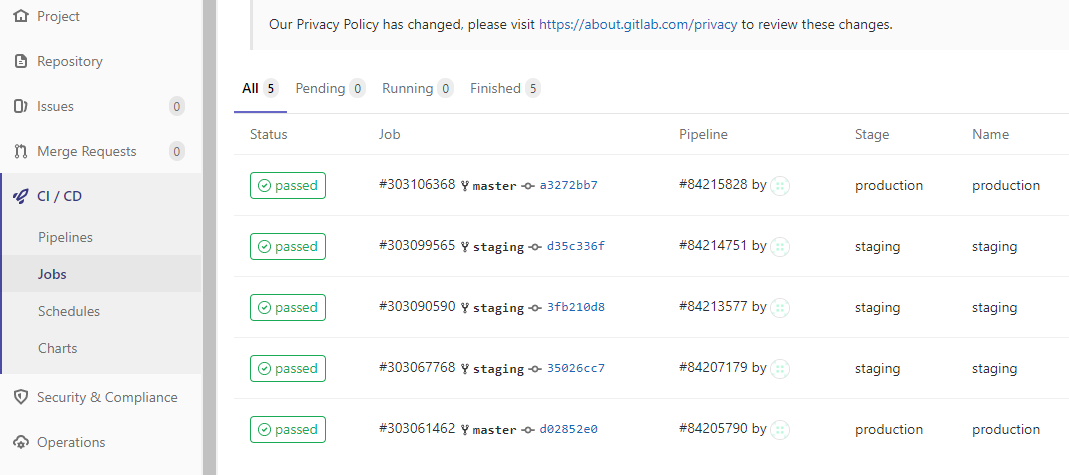
Once these settings have been saved follow the steps in the Shop developer guide to deploying to Heroku. Following the last commit in the developers guide back on Gitlab you should see the job kick off by going to CI/CD > jobs:
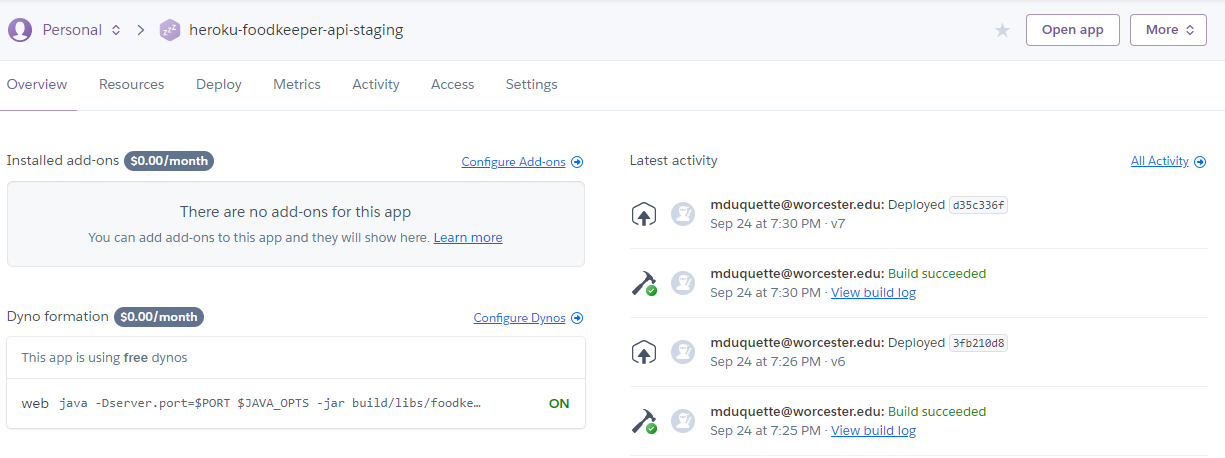
Over on Heroku go into the Staging app and you should see the job status:
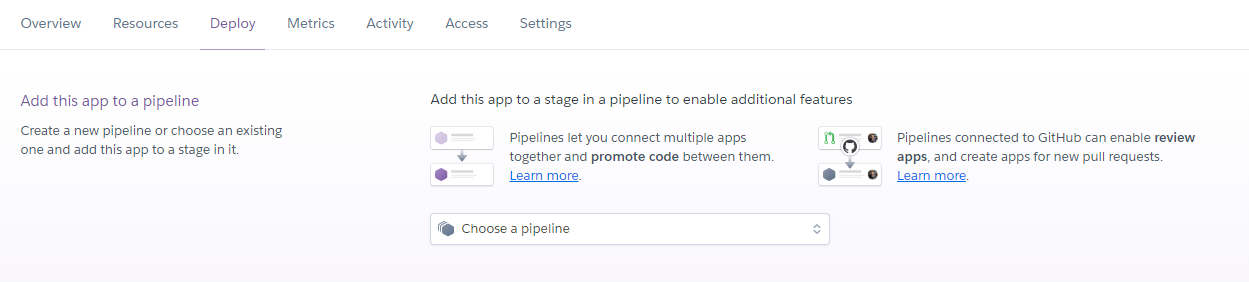
Now we can integrate the Push to Production feature within the Heroku environment. Log back into Heroku and open your staging app. Click on the Deploy tab. In the top section – Add this app to a pipeline click the dropdown next to Choose a pipeline and select + create a new pipeline
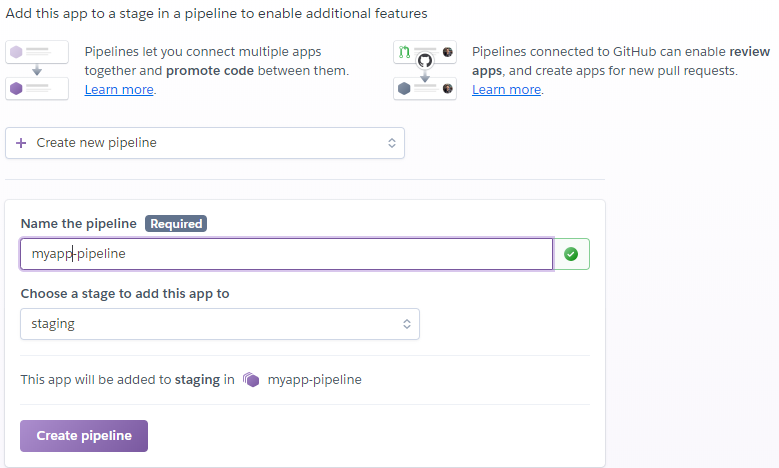
Give the pipeline a meaningful name and verify that you have staging set as the stage to add this app to and click on Create Pipeline:
Once you click on Create pipeline you will now see an App app… link to the right of the staging app.

Click Add app… and select your production app. You will need to start typing in the name of your production app in order to find it. Once you select it the Promote to production button will appear under the staging app:

You have now successfully configured Gitlab to deploy to Heroku and set Heroku to be able to promote apps from the stage environment to production.
**Developers guide to setting up Heroku for deployments**Any shop developer should be able to follow these steps to complete the setup.
Follow the below steps to prepare your projects Gitlab Repository for Heroku integration once your Shop Manager has given you the go ahead. There are steps that the Shop Manager must complete before the developers can successfully deploy to Heroku.
First clone the projects Gitlab repository locally and make a few changes. This is Followed by a commit and push.
Clone the Gitlab repository:
On your local machine create a new local folder to work from and clone your existing repository into it:
Before going any further create a staging branch of your repository. I prefer using a staging branch to work from and the master branch as production.
Let’s create the YAML file. We’ll use Travis for the deployments (more about Travis here ). Back in your bash shell create the YAML file:
Using whatever editor you are comfortable with edit the .gitlab-ci.yml
*NOTE* the file is really named .gitlab-ci.yml that is not a typo on my part. Be sure to retain that leading dot.
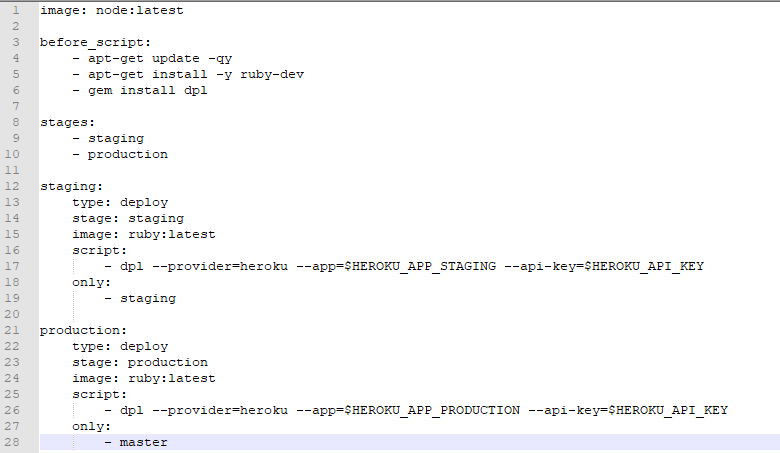
This is what you need to add to .gitlab-ci.yml:
*STOP* At this point verify with the Shop Manager that the Heroku setup steps have been completed.
Commit and push
Now you have everything setup and are ready for your first commit and test. Back in your bash shell, recall you should be on your staging branch, add commit and push the changes to the repository:
You can verify that the CI/CD is working correctly on Gitlab you should see the job kick off by going to CI/CD > jobs:
Over on Heroku go into the Staging app and you should see the job status: